
Employee Onboarding
An onboarding records which devices a new employee receives and asks the employee to confirm receipt. It is your proof of delivery, and the starting point of the offboarding when the person leaves.
Creating an onboarding
- Open Staff Management › Employee Onboarding.
- Search the employee by name or email in Microsoft Entra and select them. The account must already exist.
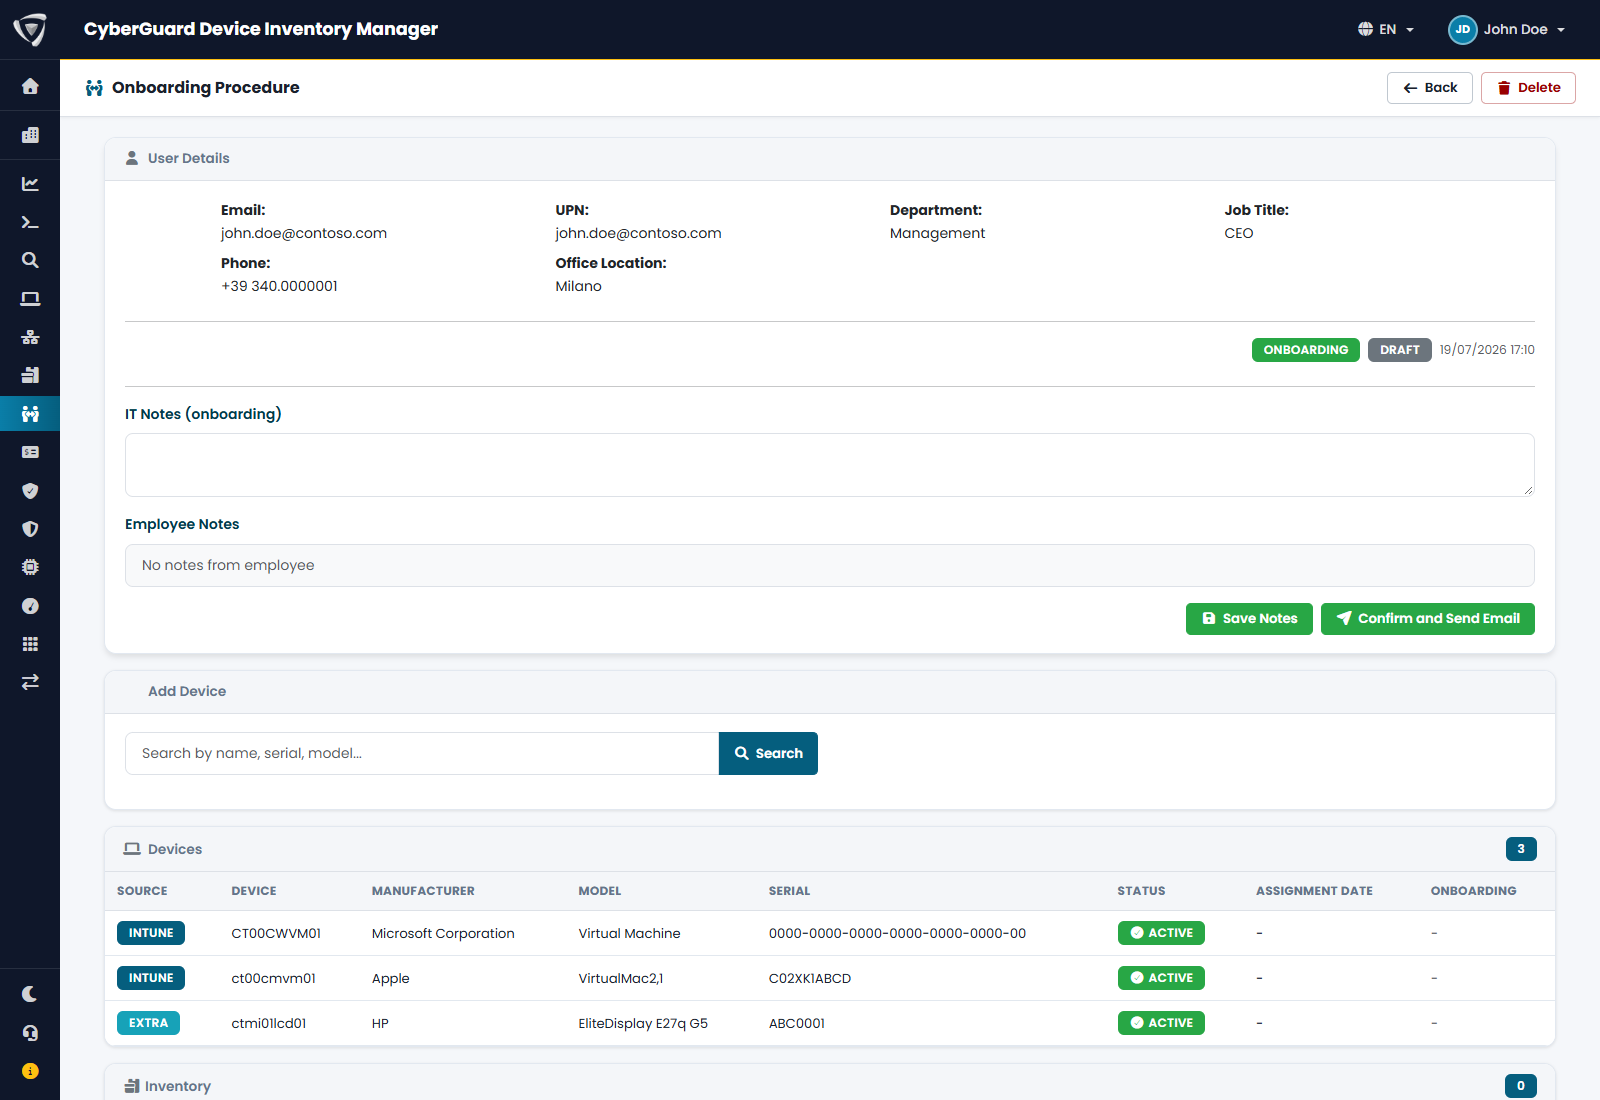
- The Onboarding Procedure page opens in Draft.
Adding devices
- In Add Device, search by name, serial number or model and click Search. The results include Intune devices and extra devices.
- Add each device the employee receives: laptop, monitor, docking station, phone.
- Add the Inventory assets the employee receives, such as a SIM card or a software license.
The devices are listed with their source (Intune or Extra), manufacturer, model, serial number and status. Extra devices and Inventory assets are assigned to the employee as soon as you add them; for Intune devices, the user is the one known by Microsoft Intune.
Write any information for the employee or for the file in IT Notes (onboarding) and click Save Notes.
Sending to the employee
When everything is ready, click Confirm and Send Email. The employee receives an email, in the language set in Settings, with the list of devices and a link. From the link, without signing in, the employee:
- confirms receipt, optionally with notes: the onboarding becomes Confirmed;
- or rejects it, with a note on what is wrong (a missing device, a wrong serial number): the onboarding becomes Rejected and IT can correct it.
The employee's notes appear in Employee Notes. The date and time of the confirmation are recorded.
Changing or cancelling
While the onboarding is in Draft, you can add and remove devices freely. Use Cancel to cancel an onboarding, or Delete to remove it completely.
Only one active onboarding per employee is allowed: opening a new one takes you to the existing one.
Permissions
Device Assignment Onboarding (see Users & Permissions).