
Network Devices
The Devices tab of Networking lists the network devices of your organization: switches, routers, firewalls, access points, NAS, printers, UPS units and any other device that answers to SNMP. They are found by the network probe, a Windows service that you install on a machine of your network.
How the probe works
You configure the probe from the portal: which networks to scan, which SNMP credentials to use and how often to scan. You never edit files on the machine where the probe runs.
At every scan the probe:
- sends a ping to every address of the networks you configured, to find the devices that are on;
- queries each device that answers through SNMP, with the credentials you assigned to that network;
- sends the results to Device Inventory Manager.
From SNMP the probe reads the device name, vendor, model, serial number, firmware version and MAC address, and recognizes the type of many devices (firewall, switch, access point, NAS). A device appears in the list only if it answers to SNMP: computers and other devices that only answer the ping are not listed.
A probe can only scan the networks it can reach. If you have several sites, or networks separated by firewalls, install one probe per site.
Each device belongs to the probe that found it. Two sites can use the same addresses, for example 192.168.1.0/24 in Milan and in Rome: their devices stay separate, because each one is identified by its IP address and its probe. If two probes scan the same network, the same device appears twice, once per probe: give each probe only the networks of its own site.
To start, follow these pages in order:
Then see Managing Probes and, if something does not work, Troubleshooting.
The Devices tab
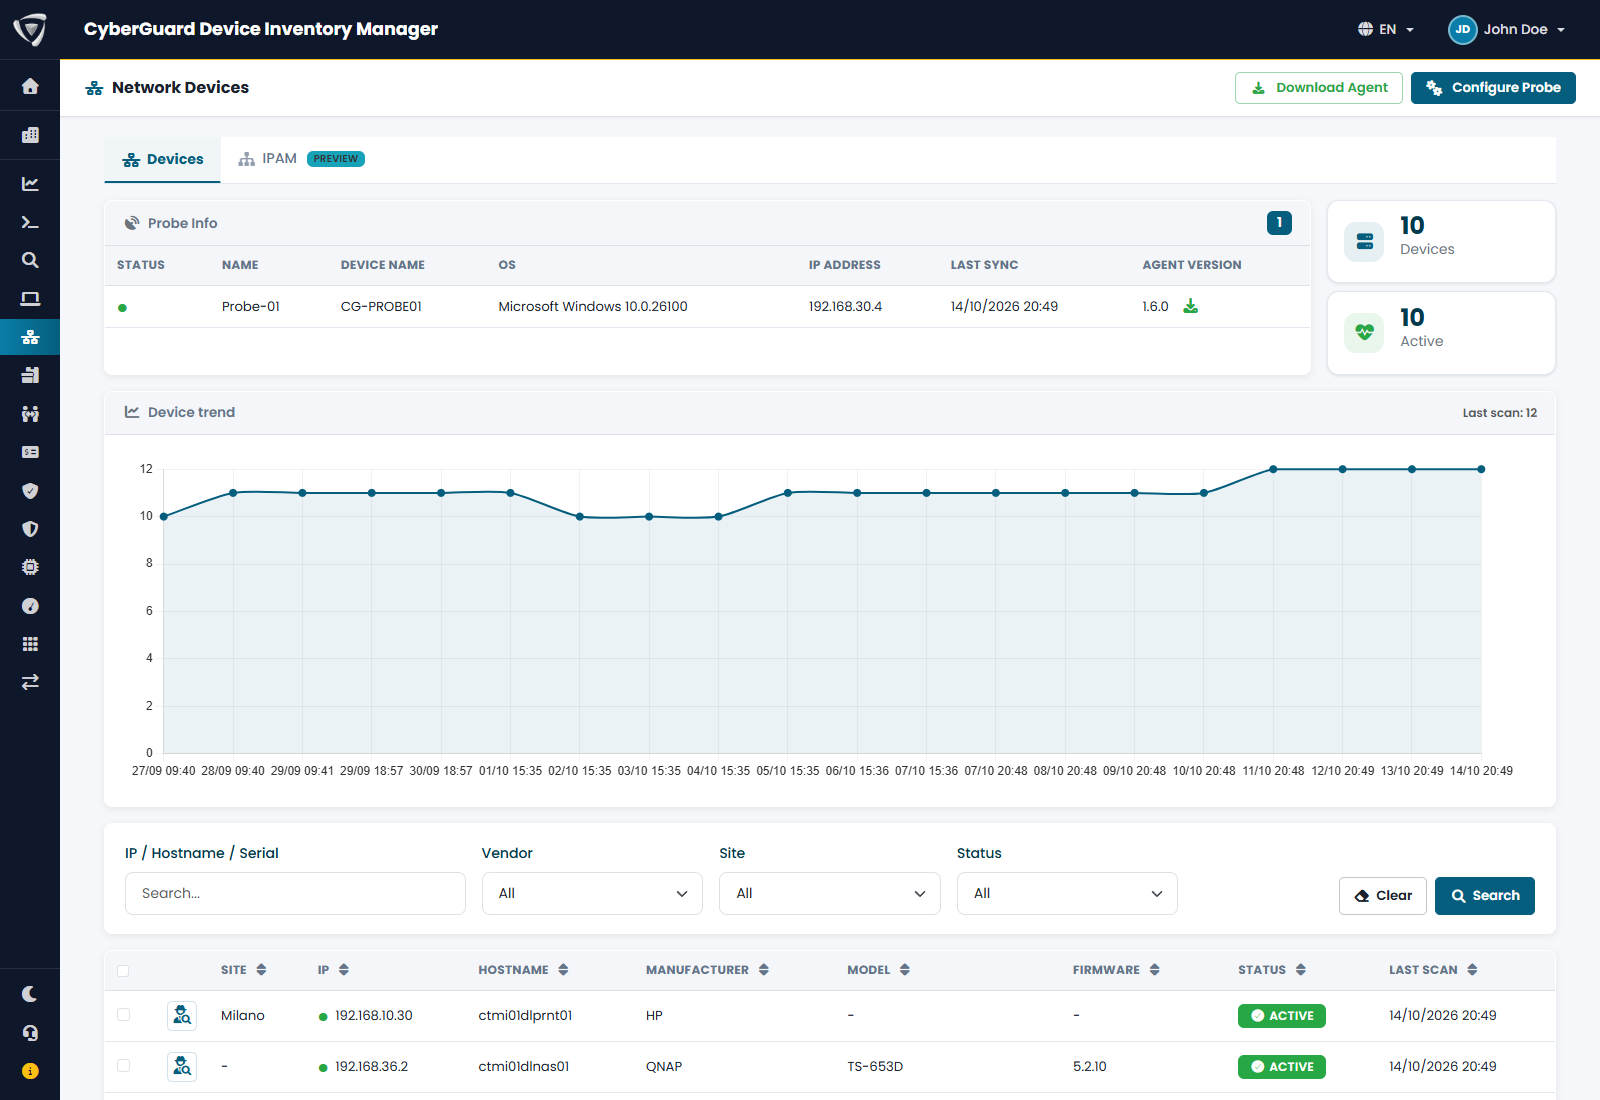
At the top of the page:
- Download Agent downloads the probe, see Installation;
- Configure Probe opens the list of your probes, see Configuring the Probe;
- Probe Info shows each probe with its status, the name, operating system and IP address of the machine where it runs, the last time it sent a scan and its version. A green dot means the probe is Online: its last scan arrived within the scan interval. A grey dot means Not recent. A download icon next to the version means that a newer version of the probe is available (see Managing Probes);
- the counters show the Devices found and how many of them are Active;
- Device trend shows how many devices each of the latest scans found.
The device list
| Column | Content |
|---|---|
| Site | The site of the device, if you set it (see The device page). |
| Probe | The probe that found the device. Shown only if you have more than one probe. |
| IP | The IP address. The dot is green if the device answered within the scan interval of its probe, grey if it did not. |
| Hostname | The name the device reports through SNMP. |
| Manufacturer, Model, Firmware | Read through SNMP. |
| Status | Active, or Disconnected if the device has not answered for more than 7 days. A disconnected device becomes active again as soon as it answers a scan. |
| Last Scan | When the device last answered. |
Filter the list by IP / Hostname / Serial, Vendor, Site and Status, then click Search. Click a column header to sort.
The device page
Click the icon at the start of a row to open the device.
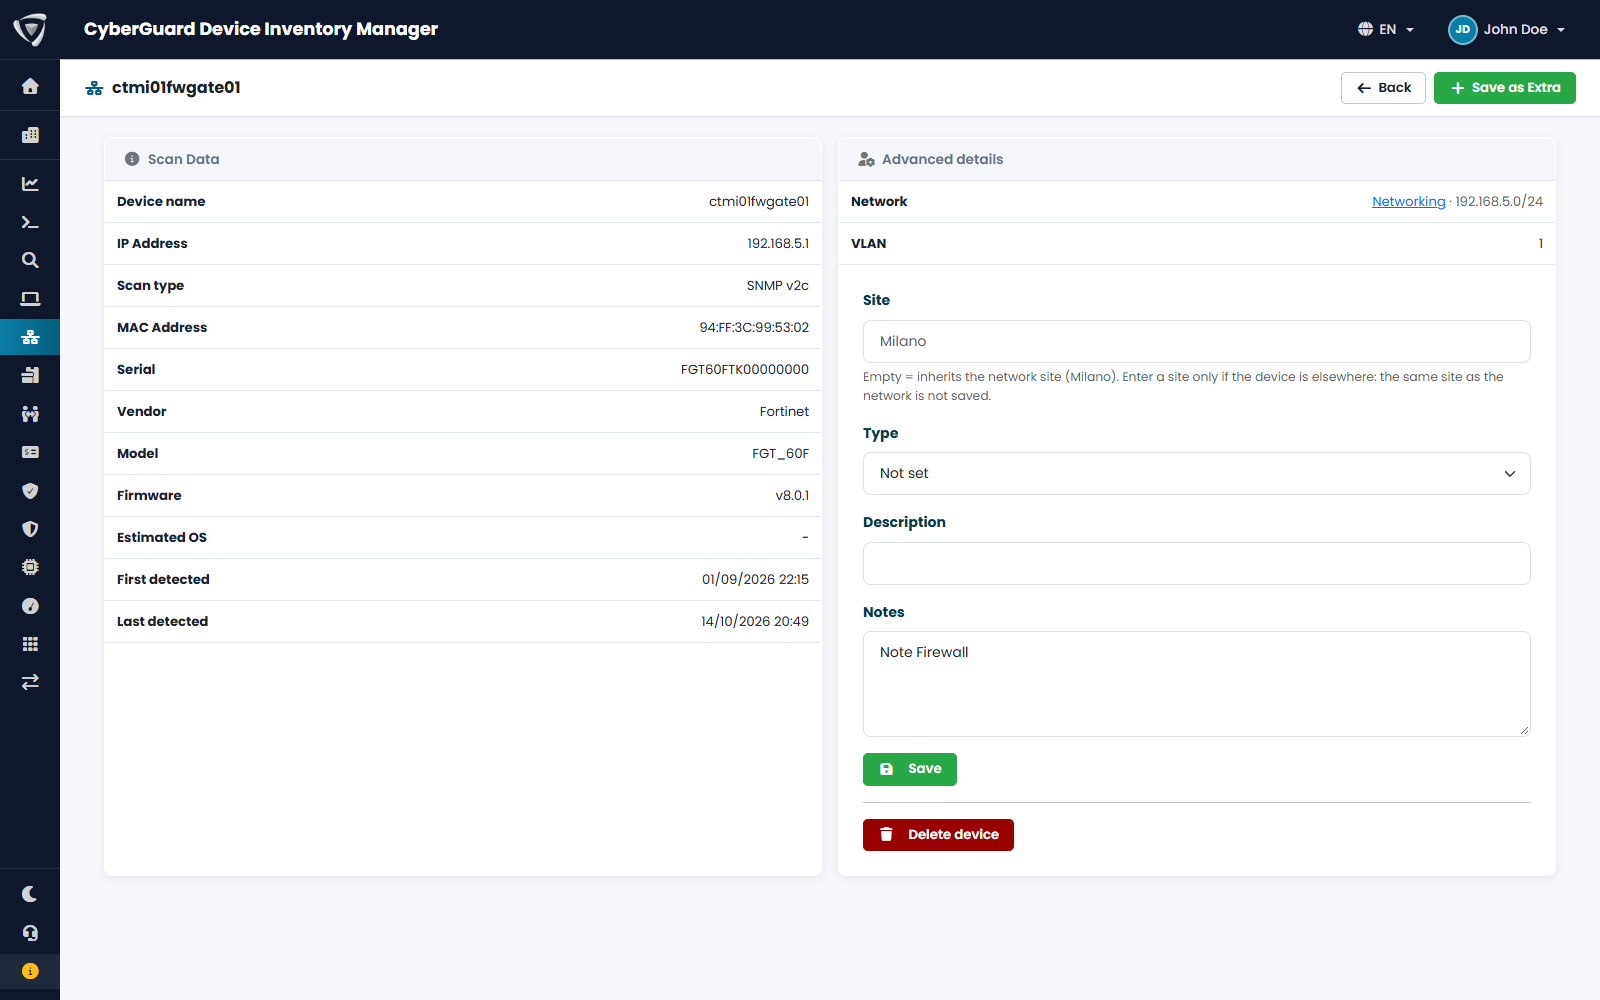
Scan Data shows what the probe read: Device name, IP Address, Scan type (the SNMP version used), MAC Address, Serial, Vendor, Model, Firmware, Estimated OS, Detected type, First detected and Last detected. If you have more than one probe, it also shows the Probe that found the device.
If the device answers to an easily guessable SNMP community such as public or private, the page shows Weak SNMP community. Change the community on the device and in the probe credentials: anyone on the network could read the device configuration.
Advanced details holds what you add:
| Field | Purpose |
|---|---|
| Network, VLAN | The IPAM network the IP address belongs to. Shown only if you use IPAM. |
| Site | Where the device is. If you leave it empty and the device is in an IPAM network, it takes the site of the network. |
| Type | The type of device, from the same list used for extra devices. Set it when the probe does not recognize the type: it is used by IPAM and by Save as Extra. |
| Description | The description of the address in IPAM. Shown only if the device is in an IPAM network. |
| Notes | Free text. |
Click Save to save these fields. Delete device removes the device from the list; if it is still on the network, it comes back at the next scan.
Saving network devices as extra devices
The network device list shows what the probe sees. To manage a device like the rest of your equipment, with warranty, rental, asset data, user and attachments, save it as an extra device.
For one device:
- Open the device and click Save as Extra.
- Check the name, manufacturer, model and serial number, and choose the Device Type. The type you set or the probe detected is proposed.
- Click Save. The new extra device opens.
For many devices at once:
- In the device list, select the devices with the check boxes.
- Click Approve selected as Extra Device.
- Choose the Device Type: it applies to the devices without a type. Devices whose type you set or the probe detected keep theirs.
- Click Save.
The extra device takes its name, manufacturer, model and serial number from the network device. A device whose serial number already belongs to an extra device is skipped, so you do not create duplicates. Each creation is recorded in the Audit Log.
The network device stays in the list: the probe keeps updating its firmware, IP address and status.