
Configuring the Probe
Everything the probe does is set in the portal: the networks it scans, the SNMP credentials it uses and how often it scans. You configure a probe before installing it, and you can change its configuration at any time: the installed probe receives the changes by itself.
Creating a probe
- Open Networking › Devices and click Configure Probe. The Probes page lists your probes, with their site and the time of their last scan.
- Under New Probe, enter the Site, for example Milan Office, and a Name, for example Probe-01.
- Click Add.
- Click the configuration icon at the start of the row to open the Probe Configuration page.
Create one probe for each site, or for each group of networks that a single machine can reach.
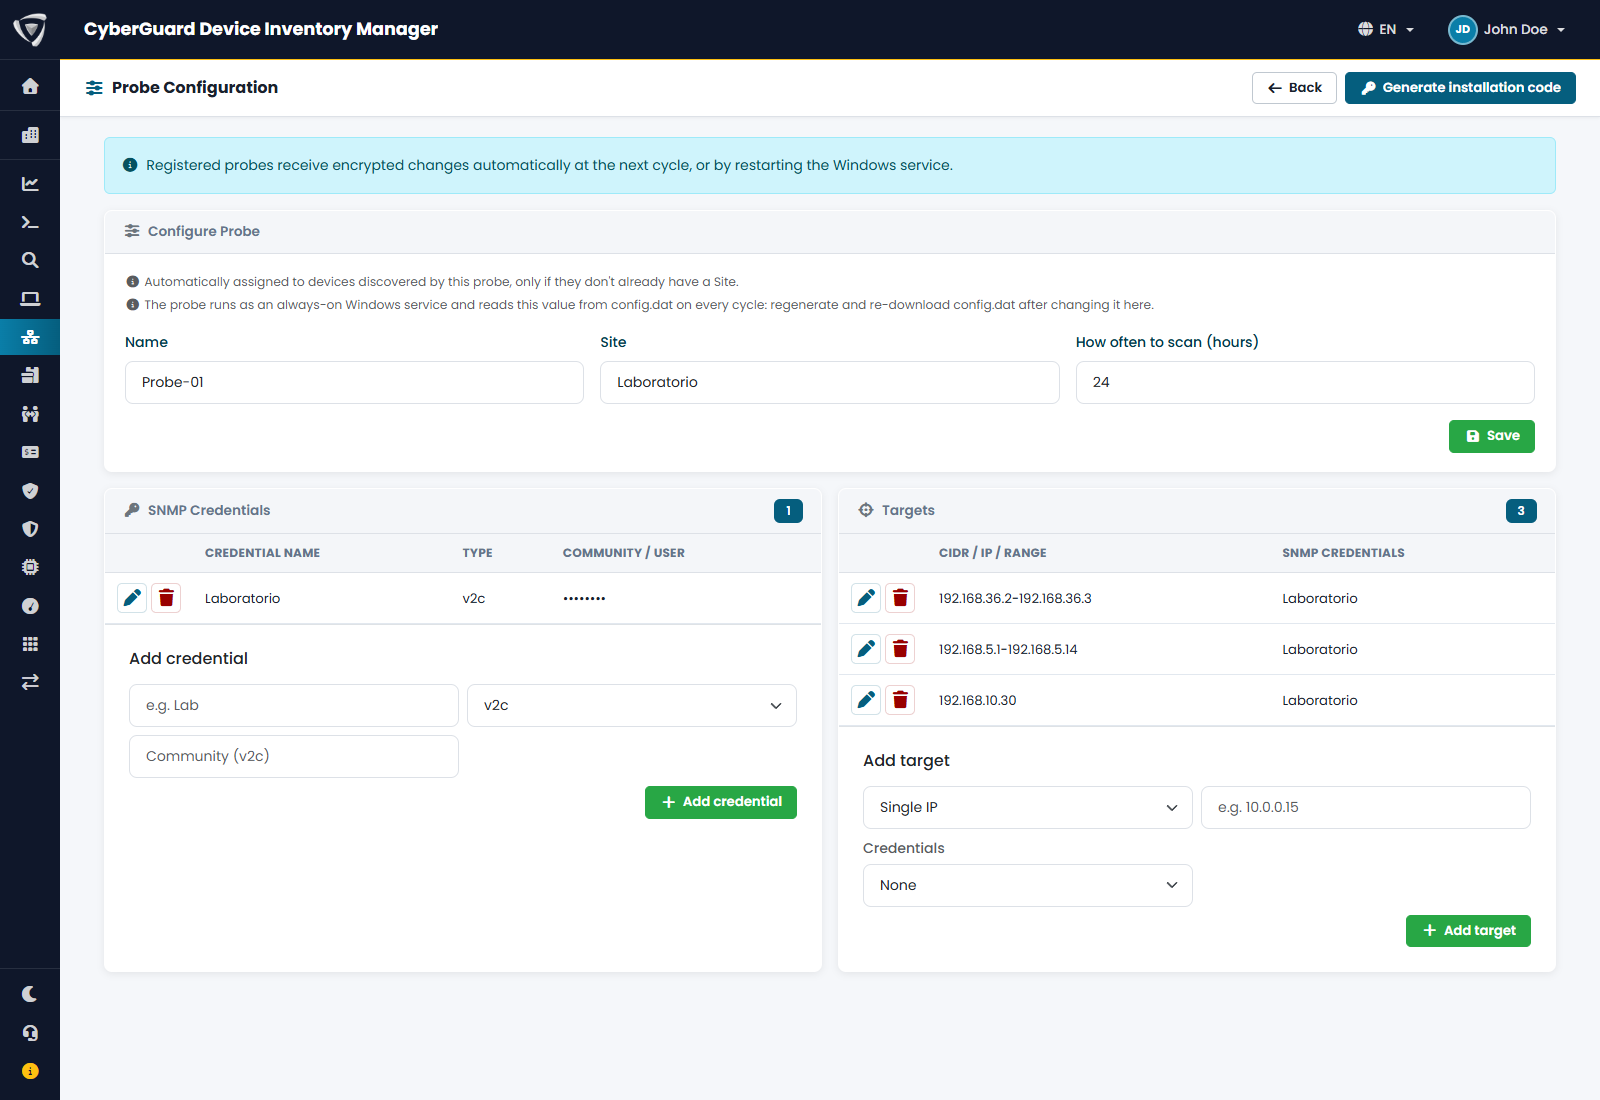
Name, site and scan interval
The Configure Probe card holds:
| Field | Purpose |
|---|---|
| Name | The name of the probe, shown in Probe Info. |
| Site | The site where the probe is installed. The portal uses it with the scan interval to tell when the devices found by this probe are no longer recent, and, in IPAM, to place them in the network of this site when two sites use the same addresses. It is not copied to the devices: their site is the one you set on their page. |
| How often to scan (hours) | The interval between two scans, in hours. The default is 24. |
Click Save.
A daily scan is enough to keep the inventory up to date. Use a shorter interval only if you need to know quickly when a device stops answering.
SNMP credentials
In SNMP Credentials you add the credentials once and then assign them to the networks to scan. A probe can have several credentials, for example one for switches and one for printers.
- Enter a Credential name, for example Switches.
- Choose the version, v2c or v3.
- Fill in the fields of that version:
| Version | Fields |
|---|---|
| v2c | Community, required. |
| v3 | User, required; Auth (MD5 or SHA) and Auth password; Priv (DES or AES) and Priv password. Passwords must be at least 8 characters long. |
- Click Add credential.
For SNMP v3, fill in only what the device requires: set Priv to None for authentication without privacy, and both Auth and Priv to None for no authentication. Privacy without authentication is not accepted.
To change a credential, click the pencil, edit the fields and click Save changes. Deleting a credential leaves the targets that use it without credentials.
When you edit a v3 credential, the passwords are not shown: leave them empty to keep the saved ones, or type new ones to change them.
Targets
Targets lists what the probe scans. For each target:
- Choose the Type and enter the addresses:
| Type | Example |
|---|---|
| Single IP | 10.0.0.15 |
| Subnet (CIDR) | 10.0.0.0/24 |
| IP Range | 10.0.0.1-10.0.0.50 |
Addresses are IPv4 only. A subnet can be at most a /16, and a range at most 65,536 addresses, as many as a /16: split larger networks into several targets. The portal refuses a target written in the wrong format and says why.
- In Credentials, choose the SNMP credentials to use on that target.
- Click Add target.
With None, the probe tries the community public: devices that answer are listed with the Weak SNMP community warning. Assign real credentials to every target.
Start with the networks of your network equipment, such as the management network of switches and firewalls, then add the others.
To change a target, click the pencil, edit it and click Save changes. To stop scanning it, delete it.
Do not give the same network to two probes: a device scanned by two probes appears twice in the list, once per probe.
When changes reach the probe
Installed probes receive the configuration encrypted, and only they can read it. Changes reach the probe at its next cycle; to apply them right away, restart its Windows service (see Managing Probes). You never need to reinstall the probe or copy files to the machine.
The SNMP credentials never leave the portal in clear text, not even inside the probe package.
Next step
When the probe has at least one target, install it.